Showing posts with label horror. Show all posts

Monday, 6 October 2014

Cracked China Doll!

Hey guys, I wanted to create something a little different this time, edging away from the gore and focusing on a character makeup this time. So I hope you like the creation of this cracked china doll, its super easy to recreate and perfect for Halloween if you don't want to be faffing around with fake bloods and waxes all night. Enjoy!
   
The Finished Look!


What You'll Need:

Illasmasqua Rich liquid foundation in 115, Naked Basics Palette, Smashbox primer,
Natural collection translucent powder, Illamasqua blush, Real techniques make up sponge
and disposable mascara wands.

Variety of face, eyes and paint brushes, Eylure Eyelash adhesive, a red lipstick
Mascara, and a red/brown lipgloss.

Eylure individual lashes and Ardell demi wispies.

Mehron Paradise Paint in Black and White.


Step One:

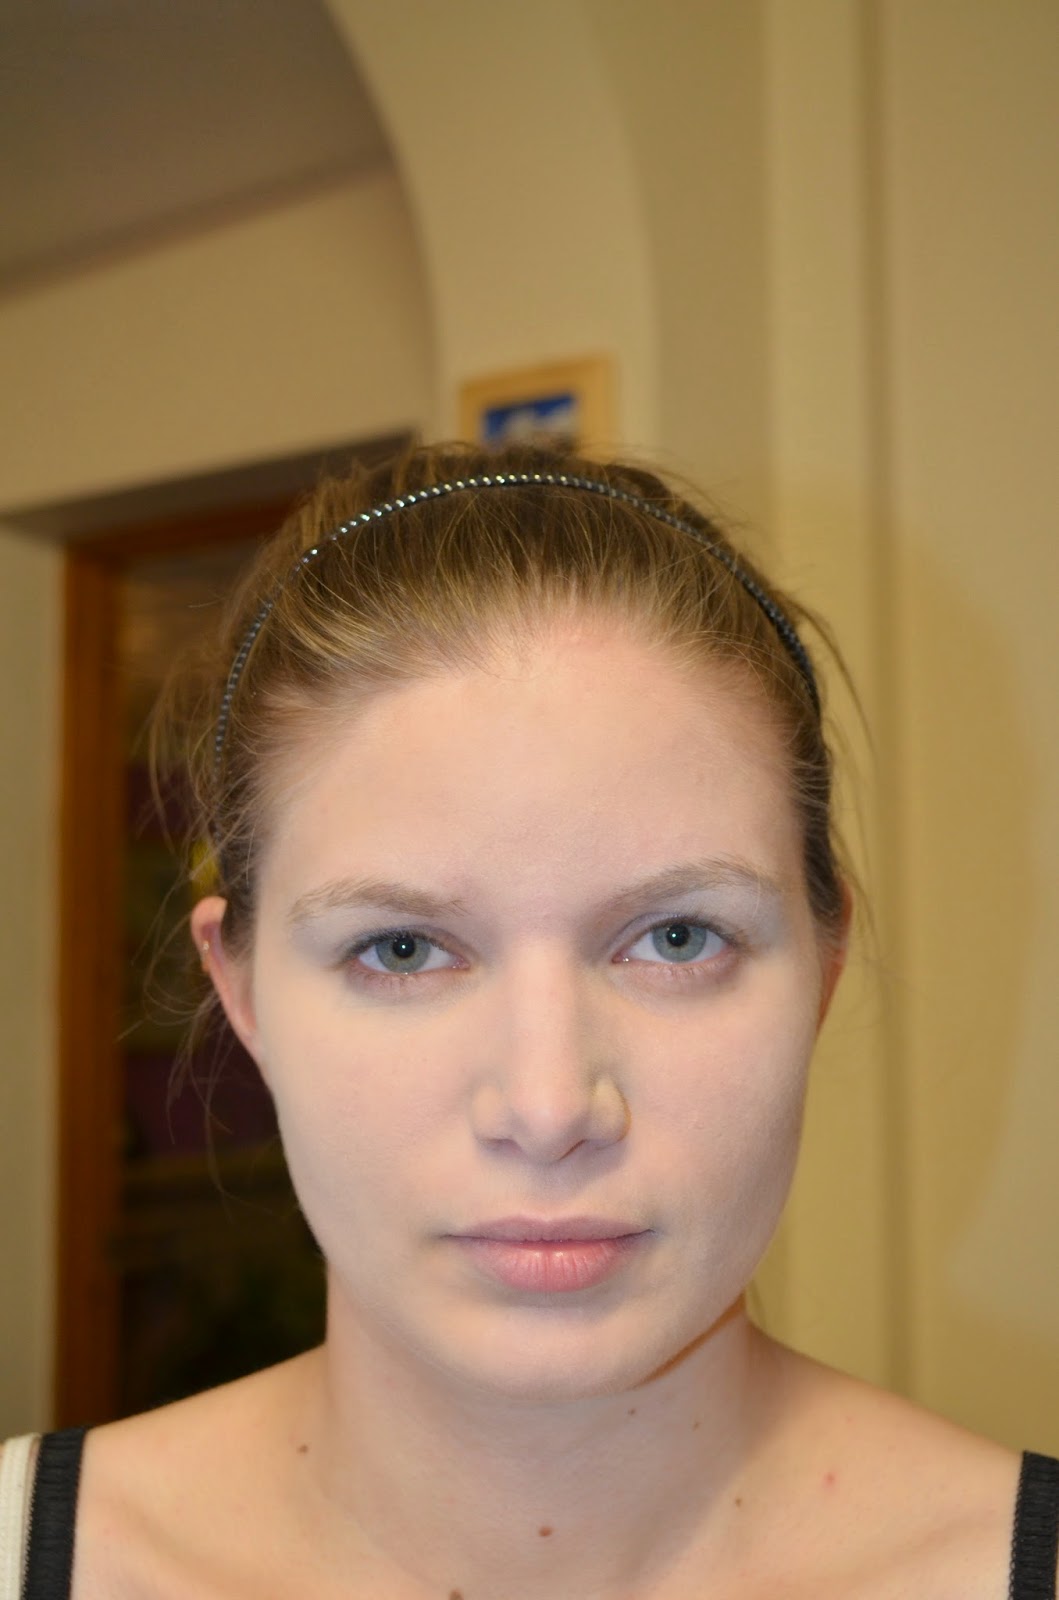
First making sure your face or your models is well moisturised, apply a matte primer to the skin to help make the makeup last, go on more smoothly and also to keep the face matte like a dolls would be. Next take a very light coloured foundation, I used Illmasquas rich liquid foundation in 115, a apply this using a damp sponge as this will create a heavier coverage than suing a brush. Apply as many layers as you need and conceal any areas where needed with the foundation. Then powder over this with a transient powder to keep the make up in place and further mattify the skin.


Step Two:

Next using W.O.S from the Urban Decay Naked Basics palette, apply this over the entire eyelid and up to the brow. Next take Naked Two from the palette and apply this lightly in the crease, just to add a small amount of definition.


Then apply a black liner either using a liquid, gel or eyeshadow for a liner. I would suggest using a gel liner as this will dry matte and unlike the eyeshadow version of eyeliner it wont smudge into the crease. Lightly line the eyes with your chosen liner, making sure there is no flick or cat eye effect.


Then take an eyebrow comb and run it through the brows to make sure they're all facing the same way. Now if you have thick dark brows, you could cover your brows to help the doll brows look more effective. There are many videos on Youtube showing you how to do this. Then next wet a small amount of Mehrons paradise paint in black, making sure the mixture isn't too wet but opaque. Then using your thin liner brush, dip this into the paint black and draw a thin line following the natural shape of your brows, or to create a more dramatic effect you can arch the brows higher up. Make sure the start and ends of the brows come to a sharp thin point.


Step Three:

Then using a thin lip brush and a coral coloured red lipstick of your choice, start to line the lips making sure to exaggerate the cupids bow by making it more rounded, making sure to fill in the sides of the lips. Also make the bottom lip more rounded and don't fill in the edges of the bottom lip to create an overall effect that the lips are smaller. 


Step Four:

Next I apply a pink blush from Illamasqua, although the camera washed out the colour of it a lot, but when applying the blush apply it from the apples sweeping it upwards. Then apply fake eyelashes to top and bottom, making sure they are very wispy. Then once all the glue has dried for the fake eyelashes using a white eyeliner to waterline your eyes.


Step Five:

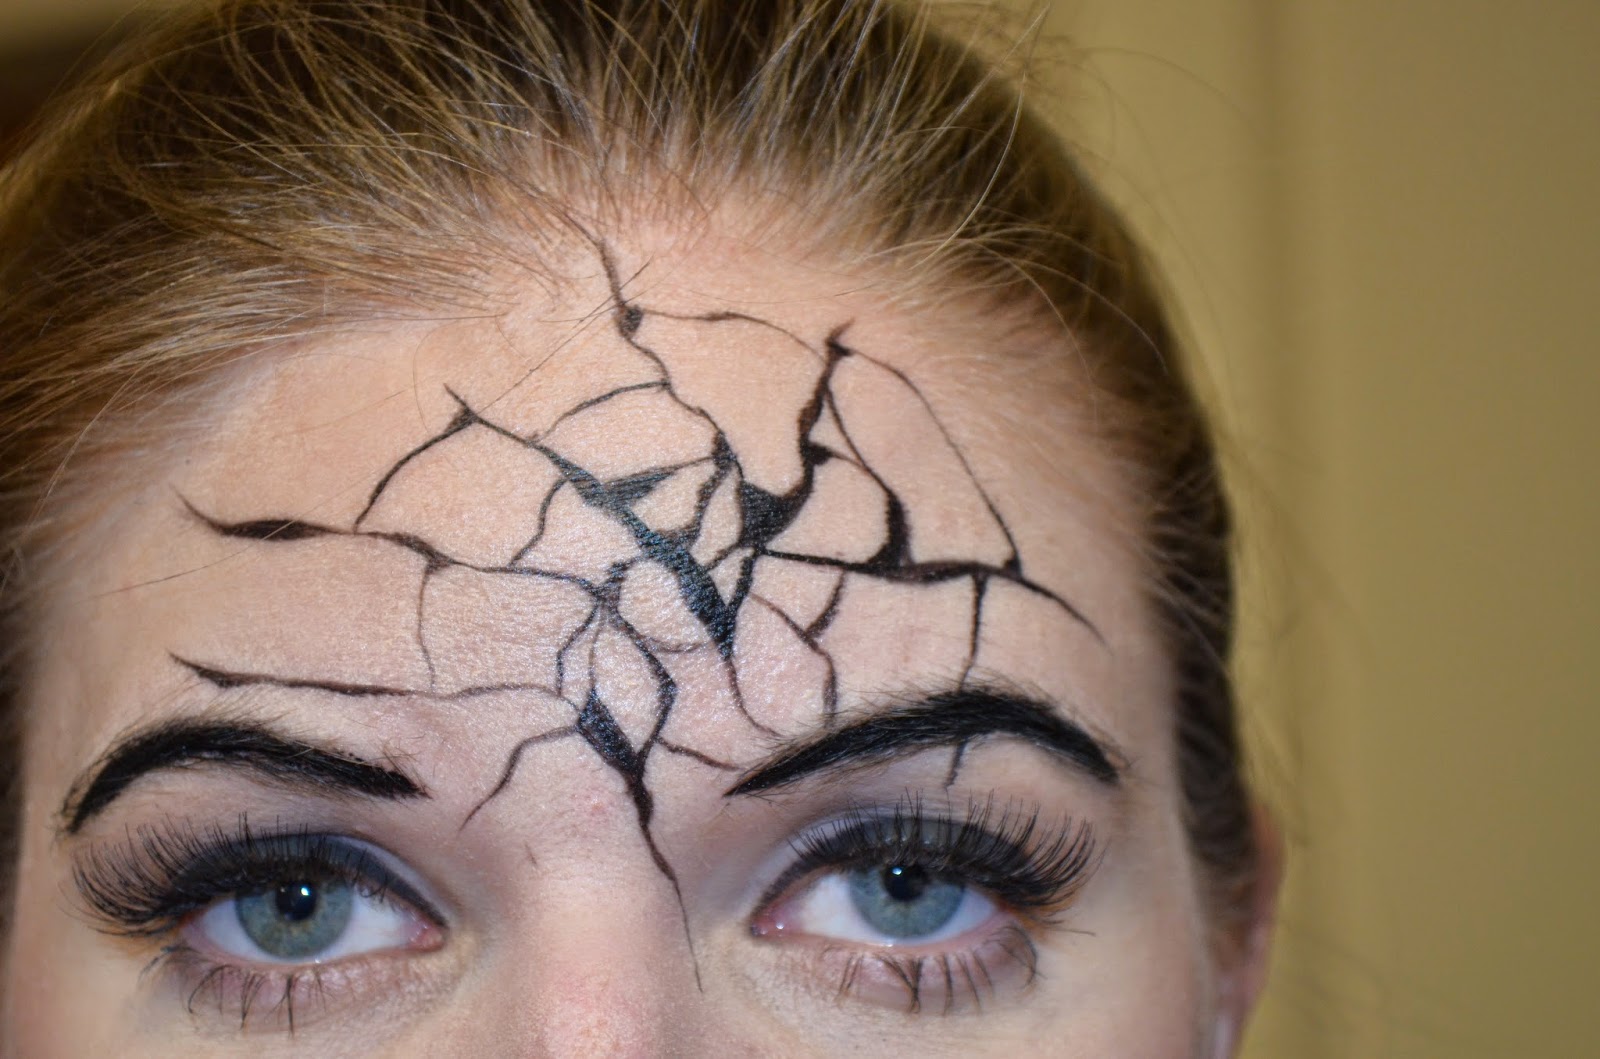
Now's time for the fun part! Using the same black paradise paint from earlier, use a very thin eyeliner brush and start creating larger black shatter marks to create the central piece of the crack. Then extend very thin lines out from these cracks.


Next start to create thin lines connecting the off coming cracks from the central larger crack marks. This will create a circular effect to the cracks. Then fill in small piece of the cracks making some parts of the crack thicker than others, and also connecting lines with small triangles in different corners.


Do a similar effect on the mouth and then leave the paint to fully dry.


Next apply highlights to the cracks, by using the Mehron paradise paint in white. Only apply the highlights to certain cracks, not everyone. Use the same liner brush you did for the black paint, just make sure you've washed it thoroughly with water and paint a thin line of the white next to the black cracks making sure its not very opaque but that there's enough colour there that you can see it.


Step Six:

Next use a large paint brush and wet the white paradise paint so you get an opaque colour.Then start to connect lines down from the shoulders to the chest, rounding the area near the chest to create the shape of a collar.


 Do this on both sides and then suing a thin paint brush outline the white paint with the black paradise paint. Then using the same thin paint brush start to create small loops on the top black line.


Next take the eyeshadows Naked 2 and Faint from the Urban Decay Naked Basics palette and apply these onto the dry white paint, using the faint in the outer corners and Naked 2 more central to help create dimension in the collar and also to age the colour of the white. Next use the Naked 2 colour to shade around the loops to give them a shadow and help create a more realistic effect. Then taking another thin paint brush mix a small amount of the white and black paradise paints to create a grey, and use this to shade they black areas of the body paint. Then use the white on its own to further highlight the black and also the loops.


Step Seven: 

All of this can easily be removed with an ordinary makeup remover and water, just remember to remove your fake eyelashes by carefully peeling them off.

Thanks again guys for looking at another one of my blog posts, as always I hope you enjoyed seeing how the look was created and have fun recreating it yourself.
Becky ox.


Wednesday, 1 October 2014

I Got Bitten! (Diseased Zombie Bite)

Hey guys after watching my YouTube feed fill up with tons of Halloween makeup looks, I saw a few variations on different types of zombies bites and I thought it would be really fun to create one of my own. Although I wish I'd done the bite further down as the anatomy isn't quite right with the bite being where it is, I'm still really happy with the result. Like the other looks featured on my blog, this would be perfect for Halloween (just remember a good adhesive and sealer will help it stay in place all night!). Hopefully you guys enjoy this look, and if so here's how I created it.


The Finished Look!


What You'll Need:


Mouldlife Sculpt Gel in Flesh

IPA (99.9%) Alcohol

Metal Palette/ Metal/Plastic Spatula

Skin Illustrator FX Palette

Skin Illustrator FX Palette

Bloodymarvellous Scratch Gel

Bloodymarvellous dark/light blood

Various Sponges


Step One:

Wipe the area you're going to apply the sculpt gel to with makeup remover to make sure the area is free of any dirt and oils that could effect the adhesiveness of the sculpt gel to your skin. Then mix equal amounts of part A,B and C of the sculpt gel mixture (add more of part C if you prefer a longer working time with the sculpt gel), by using a different spatula or tongue depressor for each part you take out, as cross contaminating the parts will make it so the part you contaminated will be unable to be used again. Once these have all been thoroughly mixed together, take half the mixture and apply it to the area your bite will be in a semi-circle shape, and use the sides of a spatula to blend it into the skin seamlessly. Be careful to make sure you have enough working time to get the piece looking how you want it to before it starts to cure. Then do the same on the other side, to create a bite shape outline. 


My sculpt gel started to cure before I could add the teeth marks, so I simply just mixed up a small batch of new sculpt gel and added it onto the current piece smoothing down the edges again. I did one side at a time so once all the edges have been blended on one side, take a spatula or stiff brush (make sure it's a brush that you don't care about, as the silicon will cure in it and you'll have to throw it away) that has a squared off end, and begin to push this down into the sculpt gel and then scrape away from the structure, wiping off any excess on a tissue. Repeat this on the other side until you're happy with the results. Also as this is curing tapping it with a sponge will help to reduce shine and add texture to it.


Step Two:

Next take a cup or beaker you dont care about and pour a small amount off the 99.9% alcohol into it, making sure you're in a well ventilated area. Then take several triangle sponges and pull random size pieces out of them. Then using the yellow from the skin illustrator FX palette, pour a small amount of alcohol into it and dip the sponge into the colour, making sure you only have a very lightly pigmented amount of colour on the sponge and randomly dab this around the bite. Repeat this step with the green, blue and bruise tone from the palette, concentrating the darker colours more central to the bite.


Step Four:

Then using blood tone from the skin illustrator FX palette, create a more opaque colour by using less alcohol than you used with the other colours on the arm, and paint this into the bite with a small paint brush. To build up intensity allow each layer to dry before adding another. Then take a mixture of bruise tone and black, using barely any alcohol, and apply this to the deepest parts of the teeth marks to help create depth.


Step Five: 

Using the wound filler gel in scratch from Bloodymarvellous, use this to lightly coat the whole bite.

With just the wound filler gel

Then taking the light blood from Bloodymarvellous use this to fill the bite, and then using a tissue randomly dab the colour all around the arm to create a spattered effect. Then use the dark blood to fill certain areas of the bite and lightly tissue this just around the bite.


Step Six:

To remove use a cotton pad soaked in PPI's Super Solv plus (sorry I forgot to photograph this) and wipe this over the arm, this will remove the colour, and then using another soaked cotton pad start brushing up the edges of the silicon and they will easily lift up and then carefully you can pull the whole silicon piece off. (Be warned if you are doing this on a hairy area, much more care will need to be taken with the removal as silicon sticks to the hairs and pulls at them. If this is the case use a cotton wool bud soaked in the Super Solv plus and gently work at unconnecting the hair from the appliance.) Then once the silicon appliance has been removed go over your arm with more Super Solve plus until all the colours, blood and any leftover silicon is gone. Then wash the area with soap and water and use a moisturizer if the area feels dry.

Once again guys I hope you had fun learning how to create this look, and have even more fun re-creating it. Thank you!
Becky ox

Friday, 26 September 2014

It's Just a Scratch!

Hey Guys, I was very excited this week when my Mouldlife sculpt gel arrived in the mail along with PPI's skin illustrator FX palette! So as you can imagine I had to create a look straight away, and since this was my first time using the sculpt gel I opted for just creating some large 'scratch' marks on the forearm rather than doing anything overly extravagant. Just be warned I did tell my sister that putting it on her forearm wouldn't be fun to remove as when you remove the sculpt gel from a place that has a lot of hair it tends to pull at, although I'll show you how to over come this. Again this look would be brilliant for Halloween as the sculpt is a 2 part (the 3rd part acts as a deadener) silicon mixture that cures dry and flexible, meaning unlike wax it wont be squashed easily or wear off easily.
But anyway here's the look, I hope you enjoy! 

The Finished Look! 

(p.s Sorry about the Pj's it was quite late :P)


What You'll Need:
Mould Sculpt Gel in Flesh
Mouldlife Sculpt Gel in Flesh


Mixing Palette, Metal and
Plastic Spatula
Isopropyl Alcohol (99.9%)


PPI - Skin Illustrator
 FX Palette
Isopropyl Alcohol(99.9%)

PPI - Skin Illustrator
 FX Palette

Bloodymarvellous Thick and Light blood

Various Sponges
Bloodymarvellous Wound filler
 gel in Scratch


Step One:

Pour some of the 99.9% alcohol into a cup/beaker you dont care about and then use a thin brush  (sorry I forgot to take a picutre of these, but they're ones that have been used in previous looks), and dip it into the alcohol so you're able to activate the aged blood colour from the skin illustrator palette. Make sure the brush is well coated in alcohol so the colour applied is quite transparent, if the colour is too opaque you can apply more alcohol to it to wash it out. 


Then take equal amounts of part A, B and C of the sculpt gel mixtures using a spatula or tongue decompressors if you have them. MAKE SURE you do not use the same end of the spatula or tongue decompressor to take each part of the mixtures out as, when part A and B are mixed together they cure and set, meaning if any of part A gets into B or B into A that silicon part will be ruined. Part C acts as a deadener and gives you more working time with the silicon and helps to increase the flexibility of the silicon once it has cured. Place each part out separetly on a metal palette (I used about 1gram of each part, and then applied more later to get my desired effect), then using whatever end of the spatula mix them together quickly.


Step Two:

Once the silicon parts have all been mixed apply directly to the skin over where you laid the marks earlier. Make sure to smooth out the edges to get a clean blend into the skin. You can also use a sponge as it starts to cure to help bring texture and reduce the shine of the silicon.


In this picture I added another 2 grams of each part A, B and C totaling 6 grams of the silicon mixture to help build up the edges of the silicon. Then carefully use the edge of your spatula to create the large scratches in the silicon pushing the excess silicon up towards the edges to help create more depth. Now allow the silicon to fully cure. You can speed up this process by using a hairdryer. The silicon will be cured once it is no longer tacky and has set in place.


Step Three:

Using the same cup/beaker as you used earlier to put the 99.9% alcohol in, refill this and use a thick wash of the aged blood in the Skin Illustrator FX palette to start filling in the inside of the wounds, allow each layer to dry before adding more colour to build intensity. Then using blood tone lightly wash this all over the scratches and around it blending it out with more alcohol and a sponge. Build the intensity where needed, such as the inside and perimeters of the scratch, by layering up the colour and using less alcohol. You can use a variety of different shaped brushes and sponges to create your desired effect.


Step Four:

Then take a metal spatula and use it to scrape out some of the would filler gel in scratch and apply to the inside of the scratches. (This stuff is extremely thick and I ended up having to use my fingers to get it to separate, but it creates a lovely effect when applied to the inside of the wound as it doesn't move.)


Just the wound gel added

Next take the thick blood from bloodymarvellous and apply this to the inside of the wound covering any areas where the wounder filler didn't go. Then taking the light blood apply this inside and around the scratches heavily and then use a tissue and dab the blood so only a little remains, this helps to create a splattered and messy effect.


After applying the light blood 


Step Five:

First use a pad soaked in the 99.9% alcohol and wipe this over the skin to remove the Skin Illustrator colours and blood. Then like I mentioned in the introduction since this was applied to a hairy part of the forearm it was a lot harder to get off than if it had been on smooth skin with little hair, as the silicon clings to the hair. So to remove this in the most comfortable way, using a make up glue remover such as PPI's Super Solv would be great, but unfortunately mine hadn't arrived in the mail yet so I used the 99.9% alcohol. To use this soak a cotton wool bud in the alcohol and start to carefully flick up the edges of the silicon by circling the cotton wool bud. Keep doing this and using new cotton wool buds soaked in alcohol until the whole appliance is removed, being very careful not to pull out any hairs or to pull too harshly on the silicon as it will hurt yourself or your model. Once the silicon appliance has been removed go over the area again with a pad soaked in the alcohol to remove any excess silicon or colour/blood and then wash your arm and apply moisturizer to it.


Thank you for reading this blog post guys, I hope you enjoyed it and I hope you have fun recreating the look.
Becky ox.