Showing posts with label beauty. Show all posts

Monday, 4 July 2016

Sephora Haul!

From time to time you just need to indulge in a little self love and treat yourself to some well hyped about products, and what better a place to let you do this than Sephora! 

Since it's very hard to get some popular U.S brands here in the UK, Sephora offers the perfect opportunity to get your hands on these with low cost shipping fees and the duties fee included in the overall cost. This way you won't get slapped with having to pay a fee before the post office gives you your eagerly awaited parcel.  

So what did I buy: 

Kat Von D

Kat Von D is one of the most hyped brands in America right now, and really only possible to get in the UK if shipped from the states.

After seeing everyone rave on Instagram and YouTube about the Shade and Light eye contour palette, and seeing that the colour selection offered a stunning selection of warm, cool and neutral tone eye-shadows within, I knew it would be perfect for everyday use. The shadows themselves are very well pigmented, although be careful as they do let off a lot if 'dust'/'kickback' so make sure to tap the excess off your brush and off the palette itself.  For me this is a must have if you need an everyday eye-shadow palette as it gives you a true range of different cool, neutral and warms tones in a smooth blendable matte formula, with a couple of light coloured satin shadows drawn into the mix so you're able to add a highlight/sheen where needed. 


The tattoo liner in Trooper is another staple you must get if you decide to buy some products from Kat Von D's makeup line. Unlike most felt tip liners that come as a stiff felt nib, this liner is actually made up of individual hairs, much like a paint brush, so you are able to get much more precision in creating either thick or thin lines. It is also very well pigmented with one line creating a deep intense black, and lasts all day on the eye but can come off in the inner and outer corners of your eyes if they tend to get watery easily. One of the best features of this product though is that the lid clicks shut, so you won't open up your make up bag to find black streaks everywhere and a dried out eyeliner.


Becca Cosmetics

When one of the most well known brands for creating stunning highlighters pairs up with one of YouTube's biggest makeup guru's you know the end product is going to be truly amazing. So its no surprise that the Becca X Jaclyn Hill shimmering skin perfector pressed in Champagne Pop became such a success. The mixture of Becca's intensely pigmented and perfectly smooth formula for its powder highlighters, along with the light golden gorgeousness of the Champagne Pop colour creates such a stunning highlight! However you may want to avoid this colour if you are very pale or if you don't like an intense highlight, but I feel that almost any skin tone could pull this colour off, and really who doesn't love a glow nowadays.


Too Faced

When I didn't think Too Faced could get any cuter with their packaging they brought out the Love Flush blushes, and I instantly feel in love! The formula of these blushes are wonderfully smooth and very blendable and are very well pigments so make sure to tap of the excess powder on your brush. They also come in a huge range of colours and different finishes so theirs something for everybody. Also they do live up to their long lasting statement as I didn't need to reapply throughout the day.


If you're in the UK and itching to get your hands on some hard to get American brands then I would definitely head over to http://www.sephora.com/ and start spending! Also you can choose free samples if you spend over a certain amount and who doesn't love that!

Enjoy browsing my dears,
Becky. xx


Tuesday, 15 September 2015

It's been a very long time... Very long! (Explanation + Haul)


I'm back after a long old year to say the least! The craziness of Sixth form is over, results are in, summer holidays have come to an end and the friends and the boyfriend are moving off to uni, so I thought it's time to get back into blogging (fingers crossed this will help me not go mad in between visits). I'm hoping this time around though since I now have free range to do what I want on my blog, no longer limited to the guidelines of my EP project, that now I will be able to combine my love for SFX makeup along with beauty makeup and general product reviews and the occasion haul - which in fact is what I have for you today, I thought it'd be a nice reintroduction post rather than how to create a rancid zombie or mangy infected bites, I mean you guys have October to look forward to that! But lets start with Boots the highstreet wonder shop where you go in to buy a chicken wrap and then come out 9 new products because the 3 for 2 deals was just too sweet to resist!
(Where to buy the products are linked on product titles)


Boots


This is a nourishing leave in cream to be used on wet hair, its claims to revive shine, smooth and tame fly-away's while nourishing your hair at the same time. For someone who has waist length hair with a lot of damage from previous bleaching and dying, especially on the ends of my hair from the whole dip dye craze, this product really stood out to me for something I could use on days where I don't want something as heavy as an oil in the thin ends of my hair and also as a product that could be used throughout the lengths of my hair rather just in the ends of it. After using this product a few times I can definitely say it lives up to its nourishing yet lightweight claims as it didn't weigh my hair down or leave it greasy, and even though the smell isn't extremely appealing it's nothing offensive and doesn't linger in my hair after I've blow dried it. 


Aussie has always been a brand that has never failed to please me when it comes to their hair products, they constantly live up their claims and I love the mixture of natural nut and fruit oils and extracts they use in their products. The reason I picked this up is because of it's lightweight claims and the miracle range has always been one that has worked brilliantly on my damaged hair. I've recently just finished up my Ojon rare blend oil and although I adore this oil it is rather heavy and if I apply just a little too much it makes the ends of my hair look oily and I end up having to spray dry shampoo on them. But I was really surprised at how much of the Aussie oil I was able to put in my hair and how after blow drying it it didn't leave it greasy at all, and I even used it all throughout the lengths of my hair. Also as all Aussie products this smells incredible!!! Using this in conjunction with the L'oreal oil-in-cream left my hair feeling really soft and definitely tamed any fizz.


Sally Hansen Airbrush legs - 'Medium Glow':(£9.99)

Now this has been a cult product for so many years now, widely being known as spray on tan/make up for your legs claiming to cover up stretch marks, bites, razor bumps and irritation. But for me as someone who has had too many bad fake tan experiences this has always been a product I've put in my basket and then at the last minute chickened out of buying and put it back. But since hearing so many people rave about it I thought let’s take the plunge, and now that it's getting colder here in England I thought this could help me look less pasty in the autumn/winter months. I got medium glow as I do have a tan from going to Japan this summer and I've heard that the one lighter than this and the lightest in the range is really a little too light if you're aiming for a tan colour. They do three more colours in the range light, deep and tan glow, and just to clarify this is a wash off product and not a long term fake tanner. I'm yet to try this out but I'm very excited to and I shall let you know how I got on with it.


Real Techniques 'Eye-lining Set' and 'Blush Brush': (£19.99 set/£9.99 blush)

Real Techniques brushes are for me the best quality and range of affordable brushes. They have a large selection of face and eye brushes, many of which frequent in my makeup bag. The blush brush is a personal favourite of mine, along with the setting brush, not only is this brush brilliant at applying and blending out blush its fine tipped bristle make it perfect for applying and blending bronzer and contouring and also applying powder.

The Eye-lining set is a new brush set featuring four different types of brushes to create different eye liner effects. The set contains the precision liner brush, the pointed liner brush, the eyeliner brush and the smudge brush. I'm really excited to try this set out, all the brushes are soft and good quality and this is the perfect kit if you want to experiment with different types of liner and not have to spend a bomb on different brushes.

Blush Brush and Eye-lining Set
Smudge Brush (Left), Pointed liner brush (center left), Eyeliner brush (center right), Precision liner brush (right) 

Fleur De Force Lashes by Eylure in 'Fleur Loves': (£5.25)

After watching Fleur's video where she announced her lash collaboration with Eylure I knew that the 'Fleur loves' lashes were ones that I had to get my hands on! And after using these lashes I can say that I definitely wasn't disappointed with the effect they gave or the ease of application especially due to the 'invisible' lash band. Unlike other 3/4 lashes I've used, these lashes fan into a clean sharp tip just like real eyelashes meaning that when they're on they really blend in well with your natural lashes, as well as adding a beautiful winged out effect in the outer corners and volume all over. The set also includes Eylure glue so there's no need to go out and buy any. Also if you're new to lashes these would be a brilliant pair to start with, as 3/4 lashes are a lot easier to apply then a full strip lash as there's no having to make sure they don't stab or pop off your eyes inner corners, but a little tip for applying any lashes is once you've applied the glue to the lash blow on it for about 30 seconds before you apply it, as this lets the glue become tacky so its actually sticks on your lashline when you apply it instead of just popping off.


'Fleur Loves' Lashes

Rimmel London Stay Matte Powder - 'Translucent': (£3.99)

This is a holy grail powder for me, it keeps you matte but still lets your natural oils come through, it doesn't cake up on the skin and it lasts a long time on the skin. The only down side to the product is the packaging which is very flimsy and can break if dropped, but for being so cheap I don't mind it at all. The only other bad note for this product is the very poor colour range, I'd say really only people with pale to lightly tanned skin could wear this powder as unfortunately there's no colours to cater for tanned or dark skin tones which seems to be a frequent disappointment in drugstore product ranges.

Rimmel London Kate Moss Nude Collection - '45': (£5.49)

After hearing frequently good comments about the Kate Moss for Rimmel London lipsticks, the release of her new nude collection made me decide to finally pick one up. In the range there's a very pale neutral nude (number 40), a more pinky pale nude (number 42), a really beige nude (number 43) and then the a beigey pink (number 45) the colour I picked up and also a dark pinky brown (number 48) and finally a clear lip balm (number 01). After wearing this a few times the lipstick is really well pigmented and due to its satin texture it lasts well on the lip but does come off when you eat and drink, so you would have to reapply throughout the day.

'Translucent' Stay Matte Powder (left), Rimmel Kate Moss Nude Collection '45' (right)

Rimmel London Kate Moss Nude collection lipstick Number '45'

MAC

Sheertone Blush - 'Blush baby': (£15)

Surprisingly this is the first MAC blush I've tried, and damn I was missing out! This blush is a neutral slightly warm toned pink blush which is really flattering with cooler toned eyeshadows and it's creamy, highly pigmented and blends extremely easily on the skin. Just be careful to tap your brush off before you apply this though, otherwise you can quickly turn rather clownish! I love to apply this with the Real Techniques blush brush shown above.

MAC Sized to go Pigments - Old Gold/Kitschmas: (£10 each)

I love these sized to go pigment, they're a great way of being able to try out different pigments without having to commit to buying a full sized one which is very hard to use up, and unlike some smaller versions of products these don't compromise on quality. Kitschmas is a cool toned light pink/lilac with a silver glitter reflects, really beautiful on the lid and inner corner to add drama to eyeshadow looks and Old gold is a dark yellow gold colour with green and yellow glitter reflects, it looks beautiful on the lid and under the eye to create an intense look.

Eyebrow retractable pencil - 'Fling': (£14)

These retractable eyebrow pencils are brilliant, they are very pigmented and come in a wide range of colours so there's a colour to suite everybody. 'Fling' is a cool toned taupe brown which is amazing for dark blondes and light brunettes, the only thing that is a problem with these pencils is you have to make sure to only wind these up a every small amount as their dry texture makes it really easy for chunks to fall off the pencil while using it which means you lose quite a few uses of the product.


Kitschmas (left) and Old Gold pigment (right)
Sheertone Blush in 'Blush baby'
Fling eyebrow pencil (left), Old Golf pigment (left center), Kitschmas pigment (center right), Blush baby blush (right)
Blushbaby blush (left), Kitschmas pigment (center left), Old gold pigment (right center), Fling eyebrow pencil (right)
Picture taken with Iphone torch shinned on products

SpaceNK

thisworks 'Sleep plus+ pillow spray': (£25)

A theme of this haul is buying products that I've wanted for a long time, put in my basket and then been like 'Nah I'll get this next time,' to only say that again the next time I go to buy it. Again this is true for this product, and I almost didn't buy it again until my lovely mum offered to buy it for me knowing my problem with getting to sleep at night. I'm the type of sleeper who tosses and turns for about 1-2 hours before actually falling asleep and frequently stays up till 4am. But after using this spray for the last week, I definitely think this product has helped me fall asleep quicker due to its herbal lavender scent, but make sure to not drench your pillows in this as the scent is really intense so a few sprays over your pillows will do you fine.


This definitely takes the prize of the Princess product, and its not really an item you have to have but it is one I love to have laying around as its great on planes as a face spritz to re-hydrate your skin and also its good sprayed over top of makeup to help take away any cakeiness. To sum up, not essential but a lovely product to have.


Lush

'Softy' Foot lotion: (£6.95 - 100g)

Although this is probably quite a TMI subject to be discussing with you guys, flakey dry feet are unfortunately a thing that run in my family and it means every summer I have to constantly exfoliate and moisturise my feet to make sure they aren't a dry mess. So after hearing good things about Lush feet products I thought I'd pick this up, and after using it a few times, I have to say that I really like it. At first I was a bit put off by its thin consistency but after applying a large amount all over my feet and popping on a moisture night sock and leaving it on for the night I am really happy with how it's helped to hydrate my feet and I can see them getting better and better the more I use this. So definitely pick this up if you suffer with the same foot infliction as me!


This is one of three new solid hair oil treatments that Lush have just brought out, also in the range there is the 'Kinky' to help curly hair and 'Tangled' to help knotty hair. I'm yet to use this product but I'm usually impressed with Lush hair treatment products, H'snan wen hna is brilliant, so I have high hopes. This is slightly different to their other products as with this you have to add hot water to the block and stir it till it becomes a thick liquid and then leave on the hair for 20 minutes, but I always do an hour or two.

Ultrabalm: (£8.95 - 40g)

I've always been put off  by this product due to the price and size, worried that I wouldn't be able to use it all up within the 1 year and 2 month expiry date, but then as I was scrolling through missjazminad's Instagram, the lip swatch model for JeffreeStar cosmetics and Anastasia Beverly Hills, and seeing that she used this along with the Lush lip scrubs that, I already own (they're brilliant!), I thought I need to try this out as her lips always look so soft and hydrated! And after trying this out for a few days it's a success, it has a much thinner consistency then I thought and it is a little grainy at first but as you work it into your lips that disappears and its leaves yours lips feeling really nourished. Other huge upside is that it only contains 3 ingredients, can be used all over the body and it's vegan.  

'Rub Rub Rub' Shower Scrub: (£14.95 - 665g)

I love this scrub, from its bright blue colour and zingy fresh scent to its powerful scrubbing abilitie, it's a repurchase for me and I definitely recommend this if you are looking for a powerful salt scrub. This leaves your skin feeling extremely soft and now Lush stock huge versions of these products so you get a lot more for your money and they last much longer, which is a huge bonus. I also love the fact that it uses salt as the exfoliating ingredient as there's a huge problem at the moment with body scrubs and exfoliators using small plastic particles as the main scrubbing product which is really harmful to small sealife, which in turns effect larger sea life, so I would recommend looking out for this before you purchase any sort of scrub whether it's for your face or body. The only downside to this scrub is be careful if you have any cuts on your body as the salt in this will make them sting a little.


'Rub Rub Rub Shower scrub (top), Ultrabalm (bottom)


Monday, 6 October 2014

Starter Special Effects Kit!

Hey guys I thought I'd share something a little different with you today. I feel it's really important whether it's just a hobby or a career you want to go in to later in life to have a great basis of products in your starter SFX kit. Although not all of these are completely essential I believe all of them will be beneficial to you in there own way. Enjoy guys.


Liquid Latex: This is a must have in your starter kit, although its not as life like as some products it's brilliant for creating skin peel effects and can be built up using tissue in between layers of the latex to create a structure. Just be careful that someone isn't allergic to latex before you use this on them.

Mehron Synwax: Waxes are a great step up from latex and while not all that durable as they can be damaged by touch, they do allow you to quickly make raised effects that can be easily coloured and sealed. 

Silicons based modelling materials: Here I have sculpt gel from mouldlife. These are brilliant at creating a long lasting flexible structure and definitely a must have if you want a step up from latex and waxes. They usually come in two parts that are mixed together and then applied directly to the skin and then moulded from there before it cures. Some silicons, like sculpt gel, come with a third part which acts a deadener to soften the silicon mixture to give it more flexibility and you more working time with the silicon.


PPI's Skin Illustrator FX Palette: This is a palette of alcohol activated paints, although they are not completely neccesssary they are brilliant at creating long lasting colour compared to cream make up that can wear off easily. Just a warning they are also very expensive and not great for use around the eyes!

99.9% Alcohol: This alcohol is used to activate alcohol activate colours and can be used to clean small areas of skin before applying as adhesive.

PPI's Telesis Super Solv Plus: This acts a remover for adhesives and alcohol activated colours, it is very quick at removing everything and the 'Plus' version is more gentle on your skin.

Ben Nye Cream Colour Wheel: These colour wheels are brilliant for beginners as they're not too expensive and they provide you with a large amount of colours to create many different looks with. Although not as durable as alcohol activated paints, they are still brilliant for creating effects. (Master bruise wheel and Death wheel by Ben Nye photographed.)


Spirit gum and spirit gum remover: Although this isn't a serious contender when it comes to adhesives this is brilliant for beginners and it means you can adhere waxes much better to the skin. Try to aim for a matte version as this has less shine.


Bloodymarvellous Fake Blood: There are many different types of blood out there but I believe when starting off a light and dark blood are essential for you kit due to the different dimensions you can create with them. I would also suggest buying small versions in the beginning in case you don't like the texture or colour of the blood. Also try to make sure the blood can be used around and in the mouth for extra safety.


Variety of make up sponges: Pictured here are regular triangle sponges, a fake sea sponge and some stipple sponges. These are all great at creating different effects and breaking up colours so they're not so flat.


Fake Eyelashes: Although not essential they're great for finishing looks, just like contact lenses, and come in many different styles.

Metal palette: These are great for mixing different colours on and also for mixing each part of a silicon modelling material together.


Face/Eyeshadow brushes: These are great for when creating a whole looks rather than just a small cut and allow you to get detailed eyeshadow work.

Paint and SFX brushes: Theses are brillliant to use with alcohol activated and cream paints and also when using latex, waxes and silicons, as these brushed can be brought very cheaply so it doesn't matter if they get ruin by the latex, and silicons that will dry into them.

Spatulas: I forgot to photograph them sorry! BUT spatulas are esstential when working with wax and silicon as they allow you to easily blend out the edges of these materials into your own skin seamlessly.

I hope you enjoyed reading about what I think is important for you starter SFX guys and that its also helped you  to decide what products would be important for you to use in your starter SFX kit! Thanks again for reading another one of my blog posts!
Becky ox.

Cracked China Doll!

Hey guys, I wanted to create something a little different this time, edging away from the gore and focusing on a character makeup this time. So I hope you like the creation of this cracked china doll, its super easy to recreate and perfect for Halloween if you don't want to be faffing around with fake bloods and waxes all night. Enjoy!
   
The Finished Look!


What You'll Need:

Illasmasqua Rich liquid foundation in 115, Naked Basics Palette, Smashbox primer,
Natural collection translucent powder, Illamasqua blush, Real techniques make up sponge
and disposable mascara wands.

Variety of face, eyes and paint brushes, Eylure Eyelash adhesive, a red lipstick
Mascara, and a red/brown lipgloss.

Eylure individual lashes and Ardell demi wispies.

Mehron Paradise Paint in Black and White.


Step One:

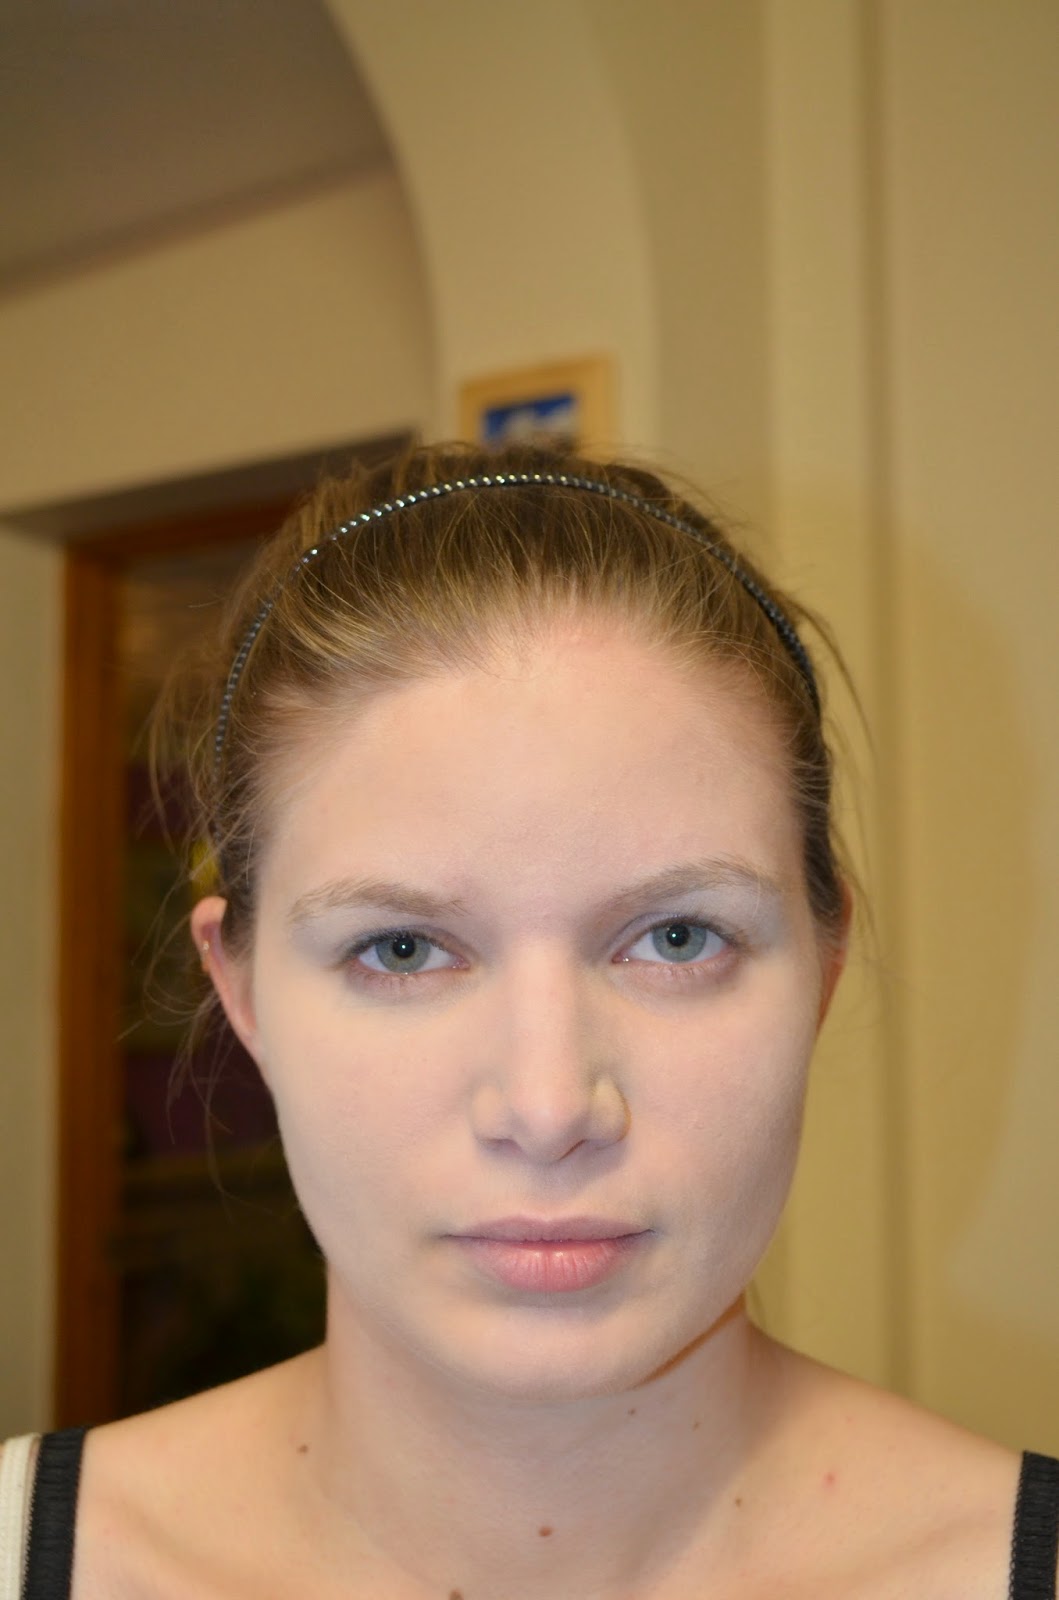
First making sure your face or your models is well moisturised, apply a matte primer to the skin to help make the makeup last, go on more smoothly and also to keep the face matte like a dolls would be. Next take a very light coloured foundation, I used Illmasquas rich liquid foundation in 115, a apply this using a damp sponge as this will create a heavier coverage than suing a brush. Apply as many layers as you need and conceal any areas where needed with the foundation. Then powder over this with a transient powder to keep the make up in place and further mattify the skin.


Step Two:

Next using W.O.S from the Urban Decay Naked Basics palette, apply this over the entire eyelid and up to the brow. Next take Naked Two from the palette and apply this lightly in the crease, just to add a small amount of definition.


Then apply a black liner either using a liquid, gel or eyeshadow for a liner. I would suggest using a gel liner as this will dry matte and unlike the eyeshadow version of eyeliner it wont smudge into the crease. Lightly line the eyes with your chosen liner, making sure there is no flick or cat eye effect.


Then take an eyebrow comb and run it through the brows to make sure they're all facing the same way. Now if you have thick dark brows, you could cover your brows to help the doll brows look more effective. There are many videos on Youtube showing you how to do this. Then next wet a small amount of Mehrons paradise paint in black, making sure the mixture isn't too wet but opaque. Then using your thin liner brush, dip this into the paint black and draw a thin line following the natural shape of your brows, or to create a more dramatic effect you can arch the brows higher up. Make sure the start and ends of the brows come to a sharp thin point.


Step Three:

Then using a thin lip brush and a coral coloured red lipstick of your choice, start to line the lips making sure to exaggerate the cupids bow by making it more rounded, making sure to fill in the sides of the lips. Also make the bottom lip more rounded and don't fill in the edges of the bottom lip to create an overall effect that the lips are smaller. 


Step Four:

Next I apply a pink blush from Illamasqua, although the camera washed out the colour of it a lot, but when applying the blush apply it from the apples sweeping it upwards. Then apply fake eyelashes to top and bottom, making sure they are very wispy. Then once all the glue has dried for the fake eyelashes using a white eyeliner to waterline your eyes.


Step Five:

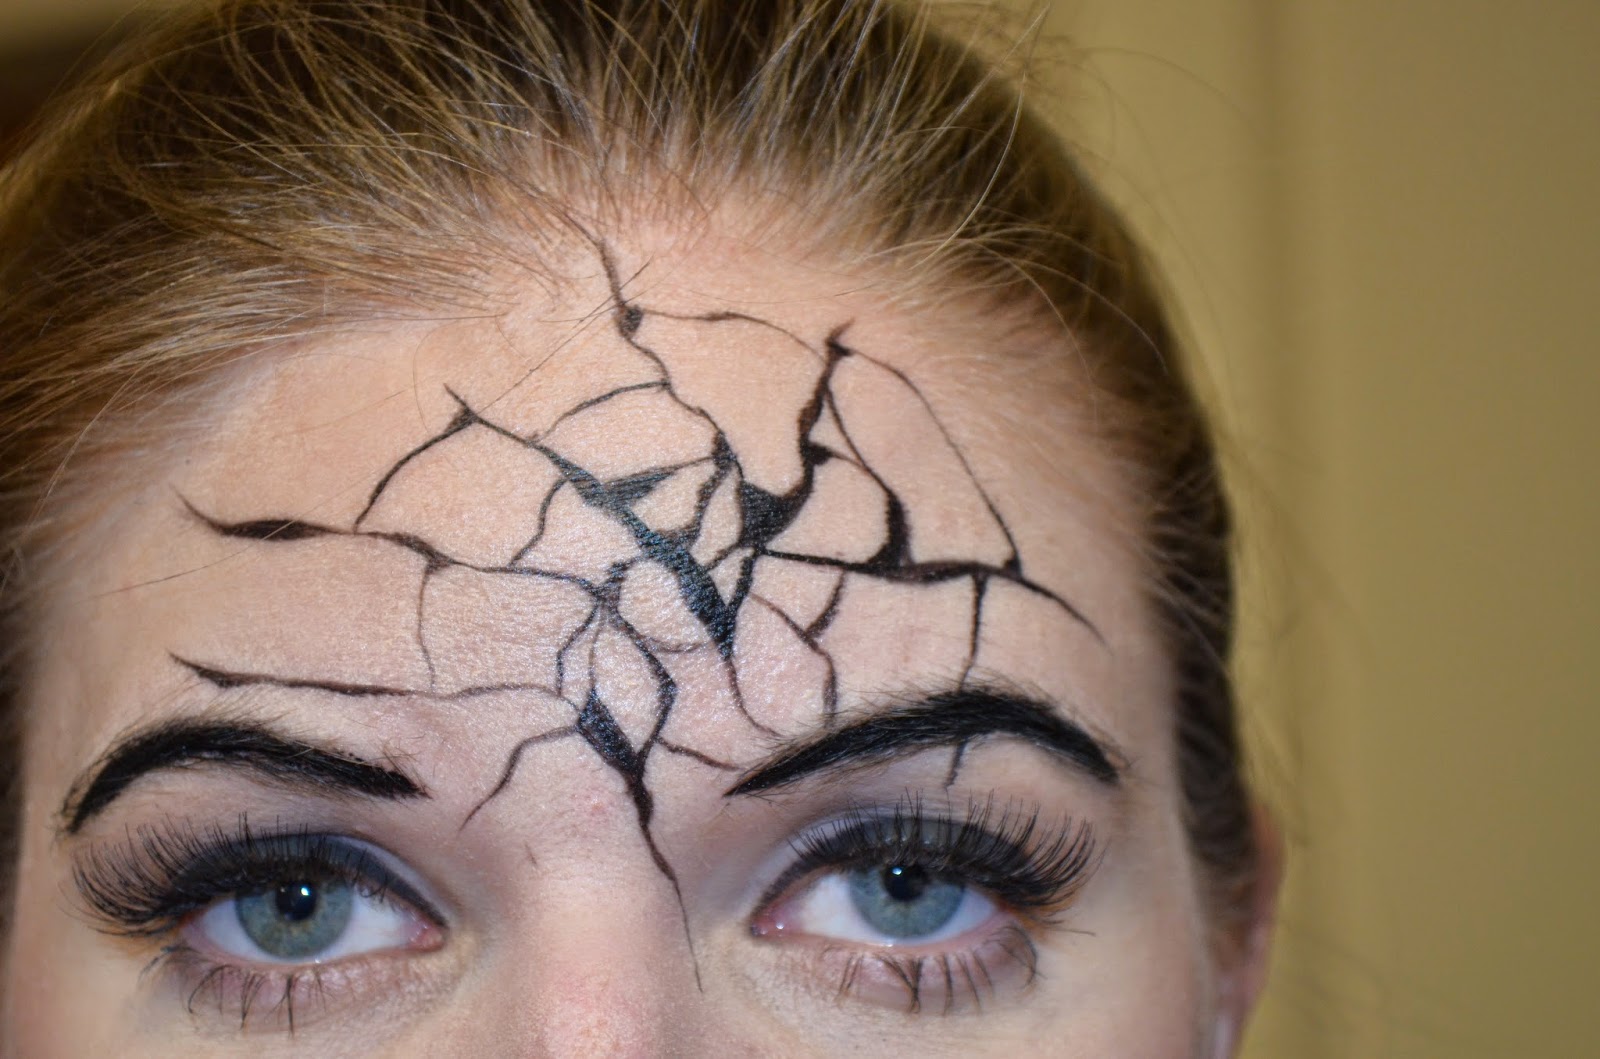
Now's time for the fun part! Using the same black paradise paint from earlier, use a very thin eyeliner brush and start creating larger black shatter marks to create the central piece of the crack. Then extend very thin lines out from these cracks.


Next start to create thin lines connecting the off coming cracks from the central larger crack marks. This will create a circular effect to the cracks. Then fill in small piece of the cracks making some parts of the crack thicker than others, and also connecting lines with small triangles in different corners.


Do a similar effect on the mouth and then leave the paint to fully dry.


Next apply highlights to the cracks, by using the Mehron paradise paint in white. Only apply the highlights to certain cracks, not everyone. Use the same liner brush you did for the black paint, just make sure you've washed it thoroughly with water and paint a thin line of the white next to the black cracks making sure its not very opaque but that there's enough colour there that you can see it.


Step Six:

Next use a large paint brush and wet the white paradise paint so you get an opaque colour.Then start to connect lines down from the shoulders to the chest, rounding the area near the chest to create the shape of a collar.


 Do this on both sides and then suing a thin paint brush outline the white paint with the black paradise paint. Then using the same thin paint brush start to create small loops on the top black line.


Next take the eyeshadows Naked 2 and Faint from the Urban Decay Naked Basics palette and apply these onto the dry white paint, using the faint in the outer corners and Naked 2 more central to help create dimension in the collar and also to age the colour of the white. Next use the Naked 2 colour to shade around the loops to give them a shadow and help create a more realistic effect. Then taking another thin paint brush mix a small amount of the white and black paradise paints to create a grey, and use this to shade they black areas of the body paint. Then use the white on its own to further highlight the black and also the loops.


Step Seven: 

All of this can easily be removed with an ordinary makeup remover and water, just remember to remove your fake eyelashes by carefully peeling them off.

Thanks again guys for looking at another one of my blog posts, as always I hope you enjoyed seeing how the look was created and have fun recreating it yourself.
Becky ox.